
Mixed Media Supplies
It is March of 2020 and the COVID virus is on the move and we are quarantined in the hopes of reducing the curve, stopping the spread, and keeping our fellow citizens protected. To ease the anxiety which is all around and channel my creativity I made some pages. Kellee Wynne, (click here to see her website) http://www.kellewynnestudios.com offered a free workshop, just what I needed at this time, and I hopped on board. As an instructor I am in creative mode constantly and right about now I wanted someone else to lead the way, get my creative juices flowing, and plan the steps. Basically I needed to be in a DO-the-process mode. Just DO IT as the Nike slogan goes. Here is how I proceeded. It is important that I give Kelle credit, because this step by step process was all hers. Of course with my own interpretation, which is how being an artist works.
 Using the Gelli Plate is so much fun. If you don’t have one, you need one! There are recipes on how to make your own gelatin plate and they work very well. I purchased mine at my local hobby/craft store. Or you can order directly from the company here http://www.gelliarts.com This is a mighty nice website with tutorials on how to use the Gelli plate for printing and various supplies. Please take a look. This is the perfect time to hone skills and explore techniques.
 Here are the prints I made with the Gelli plate. I used paper called deli wrap, yes it is the wrap used for sandwiches and is available at the big box stores. It is thin and works perfect for collage.
 Copy paper works well on the Gelli plate too and here are those pages. To the left is my 400lb. watercolor paper. I had a large sheet on hand, folded it in half, tore it apart, then folded those sheets in half again and tore apart. For this process I vowed to only use what I had on hand, being creative with my supplies, making them work. My studio is full of paints, papers, and collections that I have amassed over the years. This year I am being diligent about using what is in my studio!

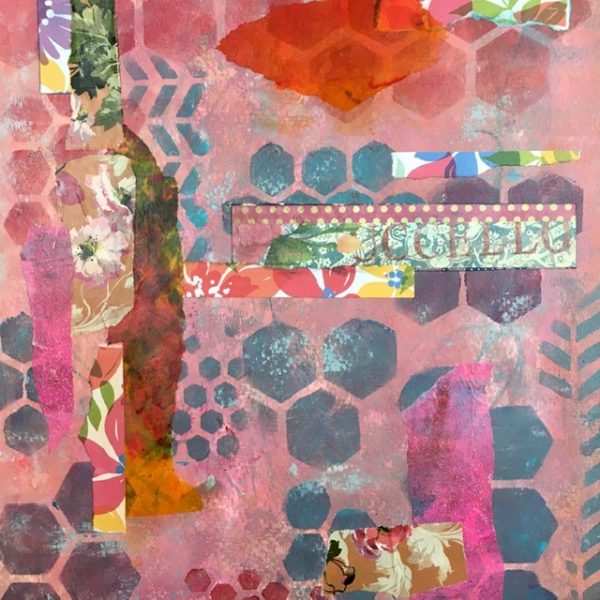
Layered page
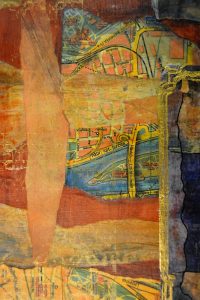
The first step was painting the watercolor paper. I used a brayer, white gesso, mixed colors, and painted both sides. For color, I went with analogous and complementary, also colors that are my favorites, hues that work for me. After the pages were dry, I added collage elements with a brush and matte medium, stencils with acrylic paint. Liquitex matte medium is my go to, and Liquitex white gesso. These two products work very well. If you have other brands which are your favorites, those will work also.

Layered Page
For my pages I added snippets of papers that I had on hand, matching color and pattern by creative intuition. I love vintage sheet music and it appears throughout my process. Fortunately, one day I was at my local library and a retired concert pianist came in with a large bundle of music to donate. He had arthritis and was unable to play the piano anymore. It was a serendipitous moment and the librarian gave me the music for a song when she discovered that I was an instructor at The Bemis Art School. www.fac.coloradocollege.edu/bemis
Layered page

Layered page
The layers of mixed media create interest. And there are no rules when it comes to this process. Sure, color theory will make a stronger statement. For example using analogous colors, or complementary colors, and pairing collage materials with those concepts in mind will be pleasing to the eye. But the bottom line is process, enjoying the process, being free with your materials, and applying what you like. When these pages are put together in an art journal, the result is a unique art piece. A “one-of-a-kind”, a “there-is-not-another-one-in-the-world”, an… ORIGINAL! Therein lies the beauty of this process.

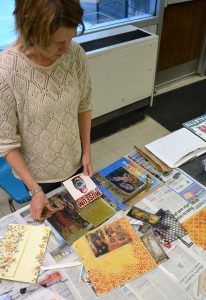
Here is my workspace. Paints, distress ink pads, a brayer on a paper plate for a palate, snippets of paper, matte medium, gel pens, stabilo markers, stencils, even a cardboard toilet paper roll in case I want to stamp some circles on the paper. This is my studio, and how my world looks when I am working in mixed media…a jumble of this and that. And take a look at the brush I used with matte medium to collage, it tends to get gunky (is that a word?) after awhile.

Matte medium and brush
I had some Golden matte medium on hand and was using it up for this project. After trial and error, as I said before Liquitex matte medium is my preference for applying collage. Since I was down to the last drops, my brush was filled with medium, but it cleaned up easily. Painted watercolor paper with collage.


This is a unique time in our lives, unprecedented in many ways. I am hoping this post will give you some ideas for how to spend time creating and using supplies on hand. It is accessible, a great way to learn how to make prints for collage and papers for a hand-bound art journal. Once I make the finishing touches, I will show you my journals, they are still in process. I absolutely love making layered pages and art journals. I have a spiral bound journal in my etsy shop with a packet of lovely collage papers in case you are interested, see the link below. By the way, I neglect my Etsy shop so there are not a ton of sales, but those that have made a purchase have been very happy. Take care fellow creatives and please leave a comment. I would enjoy hearing from you!

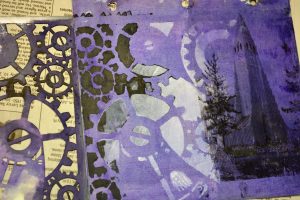 The first application was to cover chip board pages in white gesso and then a layer of hard pastels in various colors was added just before the gesso dried. Acrylic inks applied over stencils created another layer.


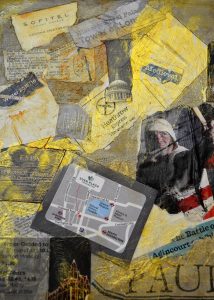
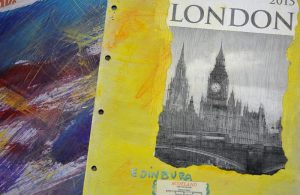


 Fused shopping bag makes for a great journal page. With an iron on a medium setting, place 3 to 4 bags together with the “star bag” on top. Lay parchment paper on top of the pile of bags, and parchment underneath the bundle. Iron away, slowly, to fuse them together. Trim to the right size, and hole punch the edge… wa-la… a page of texture and a reminder of shopping at Harrods!
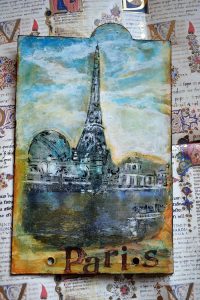 Photo image transfer with acrylic paint and some vintage letter stamps, a family heirloom one of the students brought to class for all of us to use.
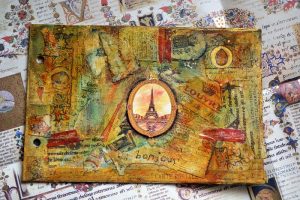
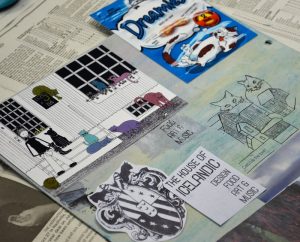
 Letters made with clear tar gel and acrylic paint.
 Stencils and drips make for interesting backgrounds.
 Teaching Travel Pages was a wonderful experience for me, and the pages created by each student were full of interesting subjects, techniques, color combinations, and layers of collage. Every student had an approach that reflected their personal travel experience. Each page was unique and demonstrated a flair for using ephemera from their adventures to make artful pages. Maybe it is time for you to pull out those maps, brochures, postcards, photographs, ticket stubs, crumpled napkins, and found papers to create an artifact of your travel escapades. It is easy to put a travel journal together using some of the techniques I have described, it just takes time, a precious commodity…but it is worth the effort!
